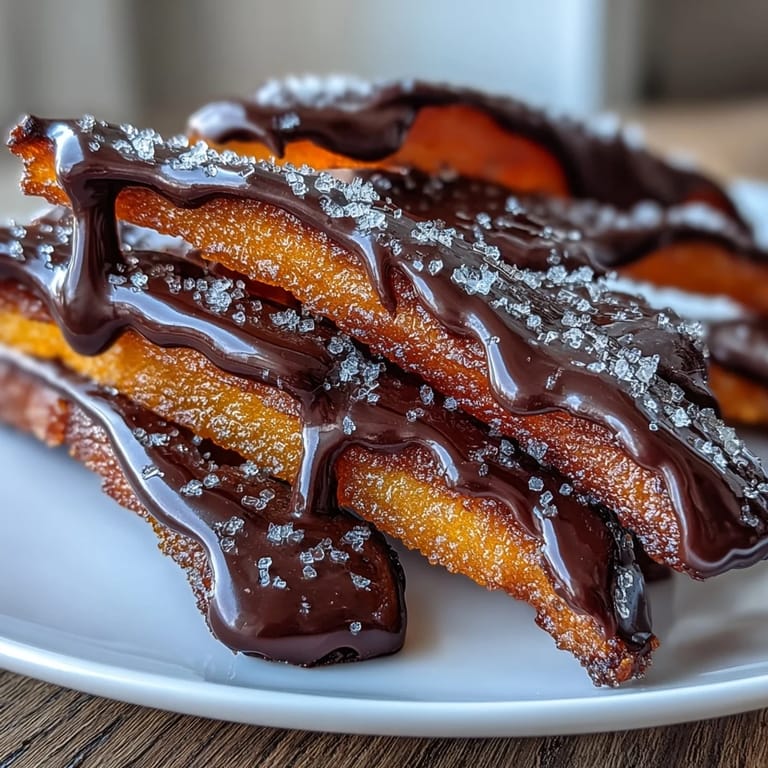
 Save to Pinterest
 My neighbor Marie handed me a small box of candied orange peel one winter afternoon, and I remember being struck by how something so simple—just fruit, sugar, and chocolate—could taste like sophistication. The bittersweet balance, the way the peel snapped between my teeth, the lingering citrus that made my mouth water. I became obsessed with recreating them, spending an entire Saturday in my kitchen learning that patience and restraint were just as important as the ingredients themselves.
I brought my first batch to a dinner party, nervous they wouldn't be good enough, and watched them disappear in minutes while people asked for the recipe. Someone asked if they were homemade, genuinely surprised when I said yes. That's when I realized this wasn't just about making candy—it was about creating something that makes people pause and ask questions.
Ingredients
- Large organic oranges (4): Organic matters here because you're eating the peel—conventional sprays concentrate in that waxy outer layer, so don't skip this detail.
- Granulated sugar (2 cups/400 g): This does the heavy lifting, dissolving into a syrup that gradually transforms tough peel into something tender and glossy.
- Water (1 cup/240 ml): Just enough to dissolve the sugar and gently cook the peels without drowning them.
- Dark chocolate (7 oz/200 g at 70% cocoa or higher): High cocoa percentage keeps the chocolate from being cloyingly sweet and balances the candied fruit beautifully.
- Extra granulated sugar for coating (optional): A final sparkle that catches the light and adds texture if you want that extra touch.
Tired of Takeout? 🥡
Get 10 meals you can make faster than delivery arrives. Seriously.
One email. No spam. Unsubscribe anytime.
Instructions
- Prepare your oranges:
- Wash them under warm water and dry thoroughly—any moisture lingering on the skin will dilute your syrup later. Using a sharp knife, score the peel into quarters as if you're cutting the fruit to eat it, then gently peel away each section, trying to keep as much of the white pith attached as you can because that's what becomes tender and delicious.
- Cut into strips:
- Slice each peel lengthwise into roughly 1/4-inch wide strips—not too thin or they'll fall apart, not too thick or they won't cook through evenly. Aim for consistency; your eye will guide you.
- Blanch three times:
- This is the secret to taming bitterness. Place strips in a saucepan, cover with cold water, bring to a boil, then drain immediately and discard the water. Repeat this twice more with fresh water each time—by the third blanch, the water will be noticeably clearer and taste far less bitter.
- Make the syrup:
- In a clean saucepan, combine 2 cups sugar and 1 cup water over medium heat, stirring gently until every grain dissolves. You'll notice the mixture stop feeling grainy and become perfectly clear—that's your signal to move forward.
- Candy the peels:
- Add your blanched strips to the simmering syrup and turn the heat to low—this is crucial because high heat can make them tough instead of tender. Simmer gently for 45 to 60 minutes, stirring every 10 minutes or so, until the peels turn translucent and a piece bends without snapping. The syrup should stay a pale golden color; if it darkens, your heat is too high.
- Dry thoroughly:
- Using tongs or a slotted spoon, carefully lift each strip from the syrup and lay it on a wire rack set over parchment paper to catch any drips. Let them sit for at least 1 hour, ideally longer, until they're no longer sticky to the touch—this matters because sticky peels will clump together and won't coat evenly in chocolate.
- Optional sugar coating:
- If you want that sparkling finish, toss the completely dried peels in extra granulated sugar, shaking off excess.
- Melt the chocolate:
- Fill a saucepan with about 2 inches of water and set a heatproof bowl on top (it shouldn't touch the water). Break your dark chocolate into pieces, add to the bowl, and stir occasionally as it melts, keeping the heat gentle so the chocolate stays smooth and glossy, not grainy or separated.
- Dip with intention:
- Hold each candied peel by one end and dip the other half into the melted chocolate, letting excess drip back into the bowl. Place on parchment paper and resist the urge to fidget with them—let the chocolate set undisturbed at room temperature for about 30 minutes, or speed things up with 10 minutes in the refrigerator.
- Store your treasure:
- Once completely set, layer them in an airtight container with parchment between layers. They'll keep at room temperature for up to 2 weeks, though they rarely last that long.
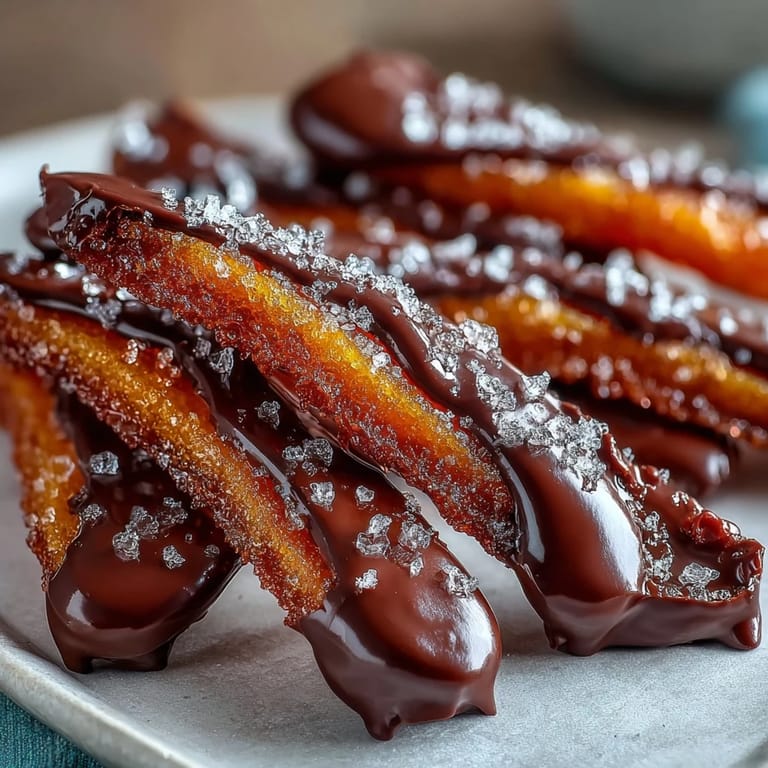 Save to Pinterest
 My sister served these at her wedding reception in tiny gold boxes, and watching guests experience them for the first time was magic—the moment of surprise when they realized homemade candy could taste this refined. That's when I understood these strips of orange peel had become more than a recipe; they were tiny edible gifts that say someone spent time thinking of you.
The Bitterness Question
The blanching process feels repetitive until you taste the difference it makes. I once tried skipping the second blanch to save time, and the result was a batch so astringent it was almost inedible. Those three passes of boiling water don't just soften the peel—they systematically strip away the compounds that make raw citrus pith mouth-puckeringly bitter, leaving behind only the clean, bright flavor you're after.
Syrup Temperature Matters More Than You Think
When I first made these, I cranked the heat to speed things up, and my candied peels came out tough and rubbery instead of silky. Turning it down completely changed everything—low, gentle heat allows the peel's structure to relax and absorb the sugar syrup gradually, becoming translucent and tender without losing its shape. Watch for the peels to turn from opaque to almost glowing, and you'll know you're getting close.
Variations Worth Trying
Once you master the basic technique, the door opens to endless possibilities. A cinnamon stick or a few cloves added to the syrup infuses the peel with warmth, though remove them before drying so they don't stick. White or milk chocolate creates a completely different flavor story if dark feels too intense, and some people roll the peels in cocoa powder instead of extra sugar for a sophisticated matte finish.
- Try candying lemon or grapefruit peel using the exact same method—each citrus brings its own personality to the finished candy.
- If your chocolate is seizing up while melting, add a tiny bit of coconut oil or cocoa butter to smooth it out again.
- Store extra syrup in the refrigerator and use it to sweeten tea or drizzle over yogurt and fruit.
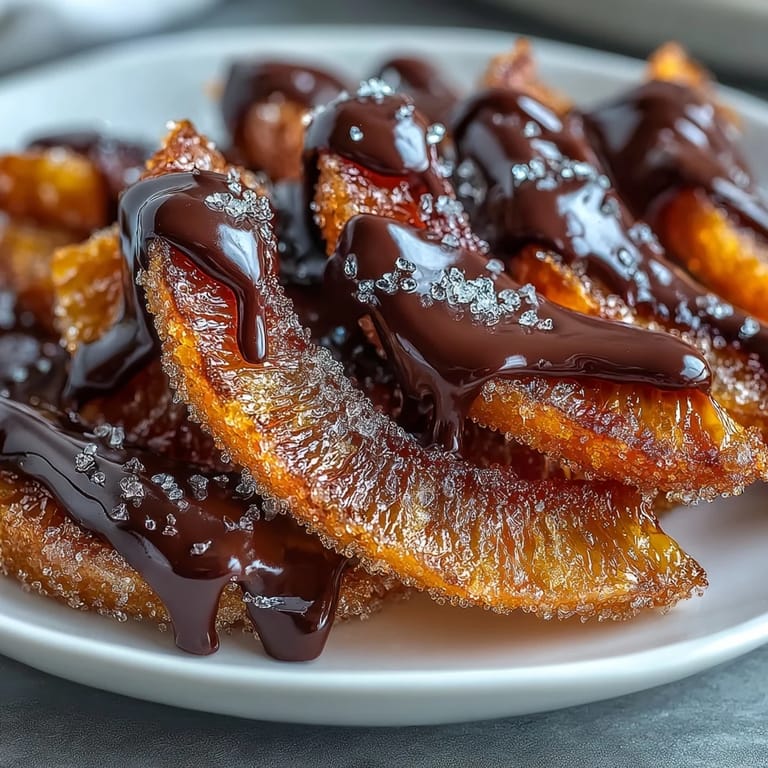 Save to Pinterest
 These candied peels have become my go-to gift when I want to give something that tastes like care. There's something deeply satisfying about transforming humble fruit into something that feels luxurious and intentional.
Recipe FAQs
- → How are the orange peels prepared before candying?
Peels are carefully scored, removed with the white pith intact, sliced into strips, and blanched multiple times to reduce bitterness.
- → What is the candying process for the orange peel?
Orange strips simmer gently in a sugar-water syrup until translucent and tender, absorbing sweetness without caramelizing.
- → How is the chocolate coating applied?
Melted dark chocolate is used to dip each candied peel halfway, allowing excess to drip off before setting.
- → Can the chocolate type be varied?
Yes, milk or white chocolate can substitute dark chocolate to suit different tastes or dietary needs.
- → How should the finished treats be stored?
Store in an airtight container at room temperature for up to two weeks to maintain texture and flavor.