Save to Pinterest
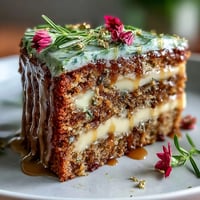
 My neighbor knocked on the door last March with her daughter, who was clutching a magazine photo of impossibly green cookies that caught the afternoon light like tiny edible emeralds. I'd never made sandwich cookies before, but something about the sparkle in that little girl's eyes made me pull out my mixer right then and there. What followed was one of those kitchen afternoons where everything just worked—the butter creamed to perfect peaks, the dough came together like silk, and when those green gems came out of the oven, even the kitchen smelled celebratory.
I brought a batch to my office potluck and watched my coworker Marcus actually gasp when he bit into one—not because they were perfect, but because the frosting oozed out and the sparkling sugar caught the fluorescent lights in a way that made everyone around the break room stop mid-conversation. That's when I realized these weren't just cookies; they were tiny edible celebrations that somehow made ordinary Thursdays feel like holidays.
Ingredients
- All-purpose flour: The foundation of everything—make sure it's fresh and measured correctly, or your cookies will spread too thin and lose that soft, tender crumb that makes them special.
- Unsalted butter: Softened butter is non-negotiable here; it's what gives these cookies their pillowy texture and rich flavor without the saltiness that would compete with the vanilla frosting.
- Granulated sugar: This sweetness combined with the creaming method creates that light, airy base that keeps the cookies tender rather than dense.
- Green gel food coloring: Gel, not liquid—liquid coloring will thin your dough and ruin the texture, but gel delivers that vibrant, almost jewel-toned green that makes these feel festive.
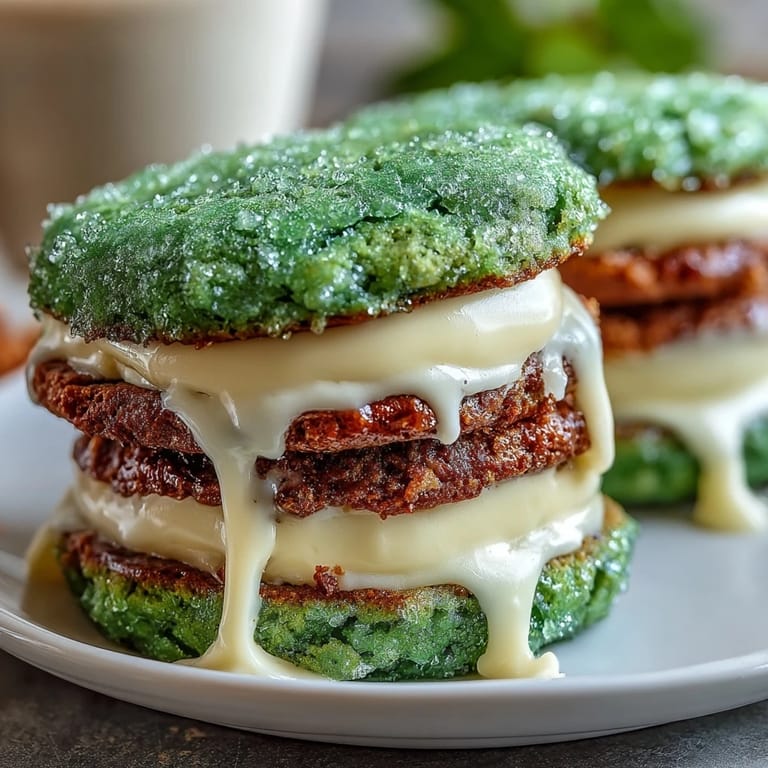
- Green sparkling or sanding sugar: This is where the magic happens; it catches light and makes each cookie look like it's been dusted with edible glitter, and it adds a subtle crunch to every bite.
- Powdered sugar: Sift it before you measure, or your frosting will be gritty and heavy instead of cloud-like and spreadable.
- Almond extract: Optional but worth it—just that whisper of almond elevates the whole experience and reminds your palate that you're eating something intentional, not just generic.
Tired of Takeout? 🥡
Get 10 meals you can make faster than delivery arrives. Seriously.
One email. No spam. Unsubscribe anytime.
Instructions
- Get Your Station Ready:
- Preheat that oven to 350°F and line your baking sheets with parchment paper while you're waiting; it only takes a minute but saves you from frantic scrambling later.
- Mix Your Dry Ingredients:
- Whisk the flour, baking powder, and salt together in a medium bowl and set it aside—this ensures even distribution and prevents lumps in your final dough.
- Cream the Butter and Sugar:
- Beat them together for about 2 to 3 minutes until the mixture looks pale and fluffy, almost like soft clouds; this step is where air gets incorporated and the magic begins.
- Add Your Wet Ingredients:
- Beat in the egg, vanilla, and almond extract until everything looks smooth and combined, scraping down the bowl as you go.
- Create That Green Hue:
- Add your gel food coloring drop by drop, mixing between additions until you reach your desired shade of green; it deepens slightly as it bakes, so go slightly lighter than you think you want.
- Bring the Dough Together:
- Gradually add your dry ingredients to the wet mixture, stirring until just combined—overmixing will make tough cookies, and you want tender ones.
- Shape and Sparkle:
- Scoop tablespoon-sized balls of dough and roll them gently in the sparkling sugar until coated, then place them about 2 inches apart on your prepared sheets. Gently press each ball down with your palm so they're about half an inch thick.
- Bake Until Perfect:
- Bake for 9 to 11 minutes—this is crucial—until the edges are set and pale but the centers still look slightly underbaked and soft. They'll continue cooking on the cooling rack and stay tender instead of turning hard.
- Cool Completely:
- Let them sit on a wire rack until they're completely cool; warm cookies will crumble when you handle them, and the frosting will melt into a mess.
- Make Your Frosting:
- Beat softened butter until creamy, then gradually add sifted powdered sugar, milk, vanilla, and a pinch of salt, beating until the mixture is smooth and fluffy enough to pipe or spread.
- Assemble Your Sandwiches:
- Spread or pipe a generous dollop of frosting onto the flat side of half your cookies, then top each with another cookie, flat side down, pressing gently so the frosting spreads to the edges. If you want extra sparkle, roll the exposed frosting edges in more sparkling sugar.
 Save to Pinterest
 That neighbor with the magazine came back a few weeks later and asked if I'd make these for her daughter's class party, which meant I finally had permission to triple the recipe and fill my whole kitchen with green dough and sparkling sugar dust. Somewhere between rolling my hundredth cookie ball and realizing I'd actually made something people genuinely wanted, I understood why people bother to decorate and celebrate with food.
The Secret to Soft Cookies
The trick isn't in some fancy ingredient or technique—it's in respecting the baking time and trusting your instincts over a timer. Those cookies will look slightly underbaked when you pull them out, which feels wrong and scary, but they're actually perfect. The residual heat from the baking sheet continues to gently set them as they cool, locking in that tender crumb that makes people ask if you bought them from a bakery.
Why Green Gel Coloring Matters
I spent years thinking food coloring was food coloring, that it was all basically the same and didn't deserve its own shopping trip. Then I actually compared them side by side and realized gel coloring isn't just stronger—it's a completely different product that respects your dough instead of diluting it. The liquid versions contain water that throws off your flour-to-liquid ratio, but gel is pure pigment suspended in a thick base that adds almost nothing extra to your mixing bowl.
Frosting and Assembly Tips
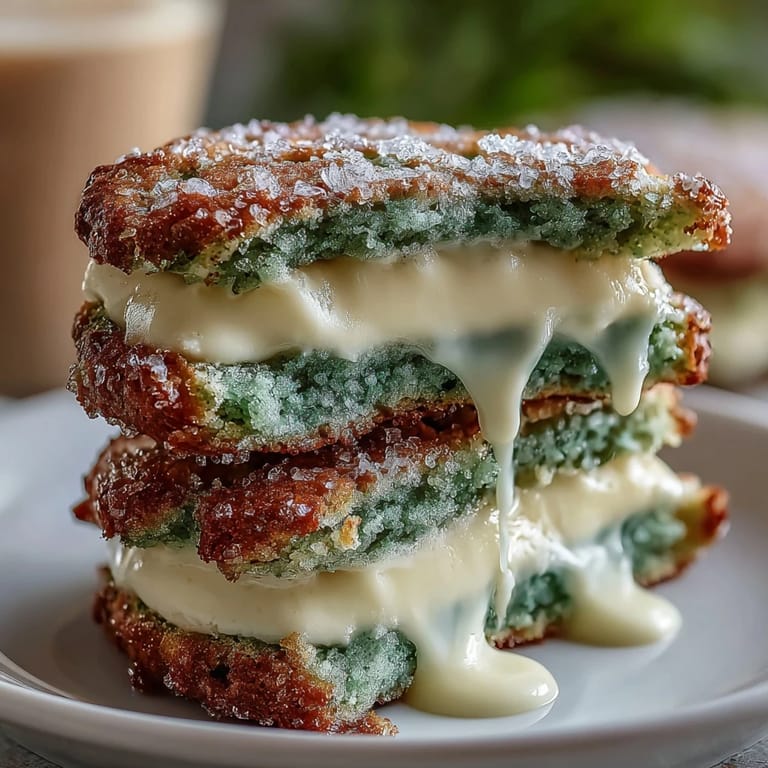
The frosting is deliberately creamy and spreadable rather than stiff, which means you can pipe it or spread it with a butter knife, and it will hold its shape just long enough without being difficult to work with. Make sure your cookies are completely cool before you fill them, or the frosting will melt into an oily puddle and your sandwich cookies will slide apart.
- If your frosting seems too soft, refrigerate it for 15 minutes before filling; if it's too stiff, add milk one teaspoon at a time until you reach the right consistency.
- Pipe your frosting in a small spiral or dot pattern rather than spreading it to the very edge, leaving a tiny border that lets the cookie flavor shine through in every bite.
- Store these in an airtight container at room temperature, not the fridge—cold frosting becomes hard and the cookies dry out faster.
 Save to Pinterest
 These cookies are proof that simple ingredients and a little intentionality can create something that feels genuinely celebratory. Make them whenever you need to turn an ordinary day into something sparkly.
Recipe FAQs
- → What gives the cookies their green color?
Green gel food coloring is added to the dough, providing a vibrant and even shade without altering the texture.
- → How do I achieve the sparkling sugar coating?
Before baking, cookie dough balls are rolled in green sparkling or sanding sugar, creating a sparkling crust once baked.
- → What is the best way to keep the sandwiches fresh?
Store assembled sandwich cookies in an airtight container at room temperature for up to three days to maintain softness and flavor.
- → Can I add any flavor variations?
Adding a few drops of peppermint extract to the dough introduces a refreshing twist perfect for festive occasions.
- → What tools are recommended for preparation?
An electric mixer, mixing bowls, baking sheets lined with parchment, wire rack, and an offset spatula or piping bag for frosting application are ideal.