 Save to Pinterest
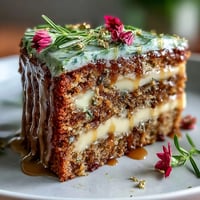
 My sister turned twenty-nine last March, and she'd been dropping hints about wanting something that matched her Pisces energy—dreamy, water-inspired, nothing too serious. I found myself staring at cake decorating videos at midnight, mesmerized by the idea of ocean waves in buttercream, and suddenly I was committed to making this happen. The vanilla sponge came together easily enough, but the real magic happened when I started layering those blues, watching the buttercream transform into something that looked like actual water frozen mid-motion. It felt like I was painting an edible ocean, and honestly, the whole thing came together better than I'd hoped.
When I pulled that finished cake out to show my family before the party, my mom went quiet for a moment—then she asked if I'd bought it from a bakery. That question landed differently than expected; it wasn't about fooling anyone, but about the small pride of making something beautiful with your own hands that people genuinely didn't expect could come from a home kitchen. My sister cried a little when she saw it, which probably says more about the gesture than the cake itself, but that's when I knew the effort had been worth every drop of food coloring.
Ingredients
- All-purpose flour (2 ½ cups / 310 g): This is your structure, and measuring by weight rather than cups makes a real difference in how tender the cake turns out.
- Baking powder (2 ½ tsp): Make sure yours is fresh; old baking powder won't give you the rise you need for that light, fluffy crumb.
- Salt (½ tsp): It's easy to skip, but salt amplifies the vanilla flavor and balances the sweetness beautifully.
- Unsalted butter (1 cup / 225 g for cake, 1 ½ cups / 340 g for frosting): Room temperature is non-negotiable here—cold butter won't cream properly and you'll end up with a dense cake.
- Granulated sugar (1 ¾ cups / 350 g): This feeds the eggs and butter, creating that light, airy crumb everyone expects from a good vanilla cake.
- Large eggs (4): Room temperature eggs emulsify better with the butter, which means more moisture and stability in your final cake.
- Pure vanilla extract (1 tbsp plus 2 tsp): Don't cheap out here—imitation extract tastes noticeably different, and this is the flavor backbone of your whole cake.
- Whole milk (1 cup / 240 ml for cake, ¼ cup / 60 ml for frosting): Room temperature milk blends seamlessly into the batter without shocking the temperature of your mixture.
- Powdered sugar (5 cups / 600 g, sifted): Sifting removes lumps and makes your buttercream silky instead of gritty.
- Blue gel food coloring (various shades): Gel coloring is stronger and won't thin your buttercream like liquid colors do—use drops, not splashes.
- White gel food coloring: A tiny amount brightens your blues without making them muddy, and helps you create that pale aqua for the wave variation.
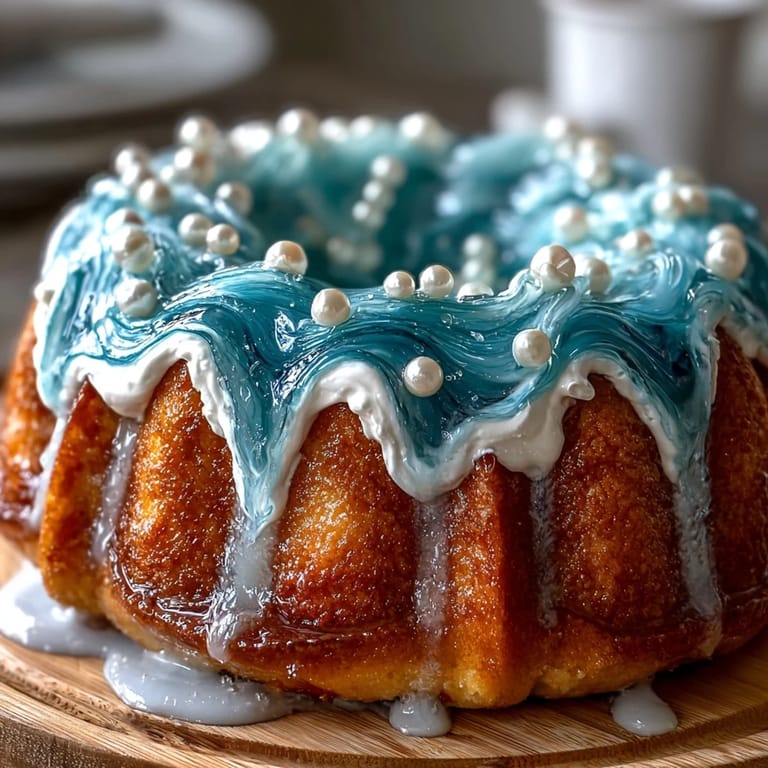
- Edible pearls or sugar pearls (optional): These catch light and add a luxury feel, like tiny treasures from the ocean floor.
Tired of Takeout? 🥡
Get 10 meals you can make faster than delivery arrives. Seriously.
One email. No spam. Unsubscribe anytime.
Instructions
- Prep your pan and preheat:
- Heat your oven to 350°F (175°C) while you grease and line a 9x13-inch sheet pan with parchment paper—this prevents sticking and makes your cake release cleanly. Parchment is your friend here; it saves you from frustration every single time.
- Combine dry ingredients:
- Whisk flour, baking powder, and salt in a medium bowl, making sure everything is evenly distributed. This aerates the flour and prevents lumps later.
- Cream butter and sugar:
- Beat room-temperature butter and sugar together for about 3 minutes until the mixture is noticeably lighter in color and fluffy—this is where your cake gets its tender crumb. You'll know it's ready when it looks almost cloud-like.
- Add eggs one at a time:
- Drop in each egg and let it fully incorporate before adding the next; this creates a stable emulsion that keeps your cake moist. If your mixture looks separated, don't panic—it comes back together once you add the dry ingredients.
- Beat in vanilla:
- Once all eggs are incorporated, add your vanilla extract and mix until combined.
- Alternate wet and dry:
- Add roughly one-third of the flour mixture, then half the milk, then another third flour, then the remaining milk, and finish with the last of the flour. Always start and end with flour to prevent overmixing, and stir just until you don't see any streaks of dry ingredient.
- Bake until golden:
- Pour batter into your prepared pan, smooth the top gently, and bake for 28-32 minutes until a toothpick inserted in the center comes out clean or with just a few crumbs. The cake will smell like pure vanilla and your kitchen will feel like home.
- Cool properly:
- Let the cake sit in the pan for 10 minutes—this allows carryover cooking and helps it set—then turn it out onto a wire rack to cool completely. Frosting warm cake causes sliding and melting, so patience here really matters.
- Prepare buttercream base:
- Beat room-temperature butter on medium speed for 2 minutes until creamy, then gradually add sifted powdered sugar on low speed to avoid a sugar explosion. Once smooth, add vanilla and milk and beat until fluffy and spreadable.
- Divide and tint:
- Split your buttercream into 3-4 bowls and add blue gel coloring in varying intensities—deep ocean blue, medium blue, pale aqua, and leave one white. Start with less color than you think you need; you can always add more, but you can't take it out.
- Apply crumb coat:
- Spread a thin layer of white buttercream all over the cooled cake to seal in crumbs, then chill for 20 minutes until set. This extra step makes your final frosting look professional instead of streaky.
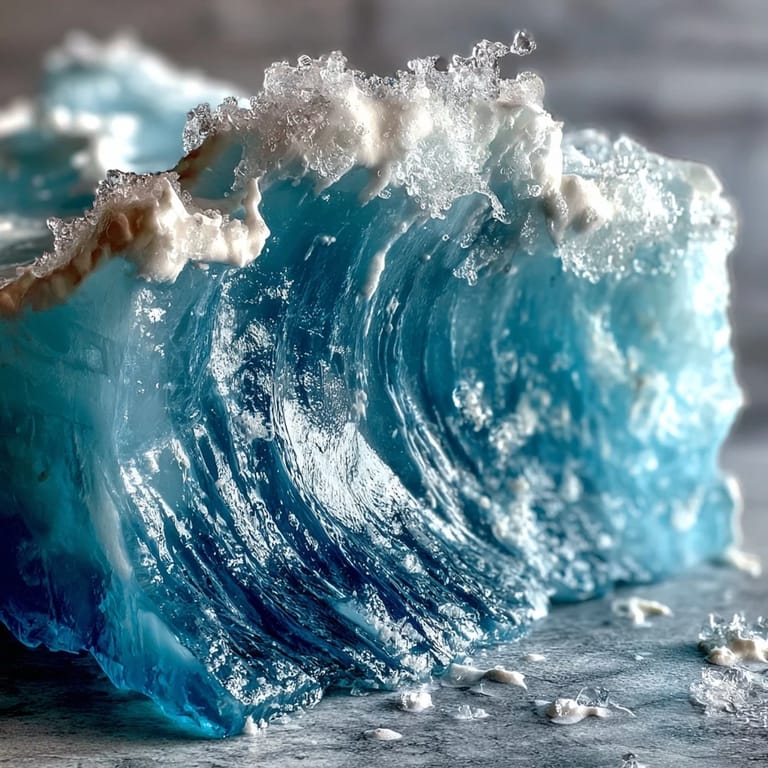
- Create ocean waves:
- Using an offset spatula, layer your blue buttercreams in swooping, wave-like shapes, starting with the darkest shade at the bottom and transitioning to lighter shades as you move up. Let each layer follow the natural curves and motion of ocean waves—imperfection is actually your friend here.
- Add sea foam:
- Pipe or swirl white buttercream on top to mimic sea foam and whitecaps. Use a piping bag with a round or petal tip and apply in loose, organic shapes rather than anything too structured.
- Finish with details (optional):
- If you're using edible pearls, scatter them gently across the cake; if you're adding a fondant or white chocolate Pisces symbol, place it now before the frosting fully sets. These details feel like the final brushstroke on a painting.
 Save to Pinterest
 There's a moment when you finish piping the waves and step back to look at what you've made, and suddenly it clicks—this isn't just a cake, it's a small act of creativity that somehow captures something about the person you made it for. That's when baking stops being about following steps and becomes about love translated into sugar and butter.
Flavor Variations That Work
If you want to elevate this beyond vanilla, lemon zest stirred into the sponge batter adds brightness and plays beautifully with the aquatic theme—think coastal lemon and sea salt vibes. I've also added a touch of almond extract (just ¼ tsp) to deepen the vanilla flavor without changing the color, and nobody can quite put their finger on why it tastes more sophisticated. The buttercream takes flavoring well too; you could add a tiny bit of coconut extract or even edible glitter mixed into the white layers for an actual sparkle effect.
Decorating Like You've Done This Before
The secret to making waves look oceanic rather than messy is using that offset spatula in long, swooping motions instead of poking and dabbing. Let the colors blend slightly where they meet—perfect gradations look flat and unnatural, but subtle color transitions look like actual water movement. If you're nervous about piping, practice your swoops on parchment paper first, and remember that loose, confident movements read as intentional while tentative lines look uncertain.
Timing and Chilling Strategy
This cake actually benefits from being made the day before if you have time; the sponge stays moist overnight and the flavors settle in a way that makes every bite taste more developed. If you're making it the day of, give yourself at least two hours from start to finish, but don't rush the cooling step—warm cake plus frosting equals a sliding disaster you don't want to fix. Chill between major decorating steps, especially after the crumb coat and after your wave layers, so each element sets slightly before you add the next.
- Bake the cake the night before if possible; it actually tastes better the next day and stays incredibly moist.
- Chill the frosted cake for at least 30 minutes before serving so the buttercream sets and the cake stays neat when cut.
- Keep any leftover cake loosely covered at room temperature if you're serving it within a day, or wrapped in the fridge for up to three days.
 Save to Pinterest
 Making a cake that looks like ocean waves is easier than you'd think, and the joy on someone's face when they see something beautiful you created with your own hands is always worth the effort. Bake this for someone special, or bake it for yourself—either way, you're making a moment worth remembering.
Recipe FAQs
- → What gives the cake its blue ombré color?
Various shades of blue gel food coloring are used to tint the buttercream, ranging from deep ocean blue to pale aqua, creating a gradient effect.
- → How do you create the wave effect on the frosting?
Using an offset spatula and piping bags, the buttercream is layered in swooping motions that mimic the natural curves of ocean waves.
- → Can the cake be made ahead of time?
Yes, the cake can be baked and frosted a day in advance and stored in the refrigerator to allow flavors to meld and decorations to set.
- → What tools are needed for decorating the waves?
An offset spatula for spreading and piping bags with round or petal tips are recommended to achieve the wave shapes and textures.
- → Are there options to enhance the flavor of the sponge?
Adding lemon zest to the sponge batter can provide a fresh, citrusy note that complements the vanilla and blue buttercream.